Indoor vs outdoor surveillance cameras
Indoor vs outdoor surveillance cameras:Home security is more important than ever, and surveillance cameras play a crucial role in keeping our properties safe. When you're looking to install cameras, you'll quickly realize there's a big distinction to make: indoor vs. outdoor surveillance cameras. While they both serve the primary purpose of monitoring, their design, features, and optimal use cases differ significantly. Understanding these differences is key to building a robust and effective security system for your home.
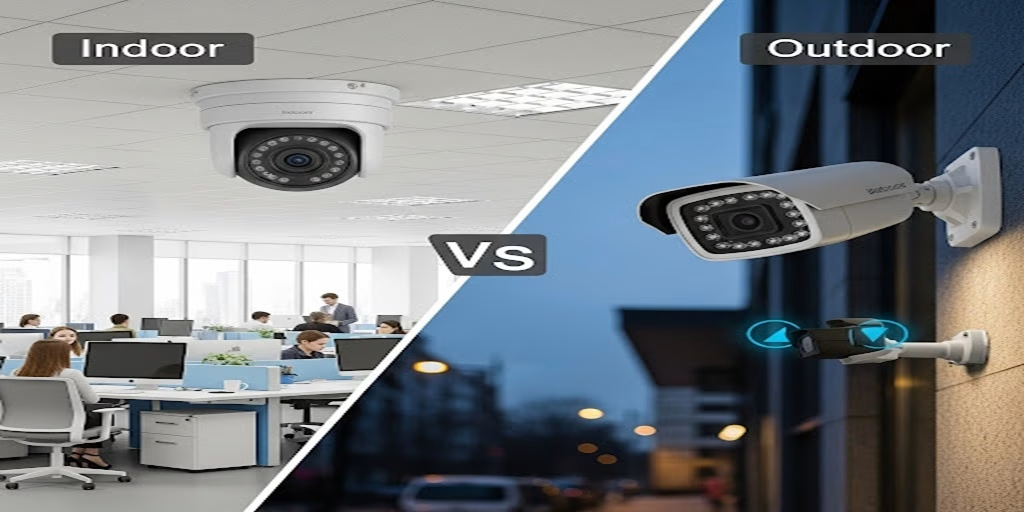
Indoor vs outdoor surveillance cameras: Environment and Design
At their most fundamental level, the primary difference between indoor and outdoor cameras lies in the environment they’re designed to operate in.
Outdoor cameras are built to withstand the elements. Think about what a camera outside your home experiences: rain, snow, extreme heat, freezing temperatures, dust, direct sunlight, and even potential tampering. Because of these harsh conditions, outdoor cameras are typically:
- Weatherproof/Waterproof: They have an IP (Ingress Protection) rating that indicates their resistance to dust and water. A higher IP rating means better protection. For instance, an IP66 rating is common for outdoor cameras, meaning they’re dust-tight and protected against powerful jets of water.
- Durable Casings: Often made from robust materials like metal or hardened plastic to resist impacts and vandalism.
- Wider Operating Temperature Ranges: Designed to function reliably in both sub-zero winters and scorching summers.
- Enhanced Security Features: Sometimes include anti-tamper mechanisms or more secure mounting options.
Indoor cameras, on the other hand, operate in a much more controlled environment. They’re not exposed to rain, snow, or extreme temperature fluctuations. This means they can be:
- Less Robust: Their casings are often made of lighter plastics and aren’t designed for impact resistance or weatherproofing.
- More Aesthetically Pleasing: Often designed to blend into home decor, with smaller, sleeker profiles.
- Simpler Mounting: Usually designed for easy placement on shelves, tables, or simple wall mounts.
Key Features: What to Look For in Each Type
While some features overlap, certain functionalities are more critical for one type of camera than the other.
Features Crucial for Outdoor Cameras:
- High Resolution (4K preferred): Outdoor cameras need to capture fine details, like license plates or facial features, from a greater distance. Higher resolution provides clearer images, which is vital for identification.
- Superior Night Vision: Most outdoor activity, especially suspicious activity, happens at night. Outdoor cameras often feature more powerful IR (infrared) illuminators for longer-range night vision, sometimes even incorporating color night vision technology for better detail in low light.
- Wide Dynamic Range (WDR) / High Dynamic Range (HDR): This is essential for handling challenging lighting conditions, such as direct sunlight or deep shadows, which are common outdoors. WDR/HDR helps balance bright and dark areas in the image, ensuring you don’t get washed-out or underexposed footage.
- Motion Detection with Smart Analytics: Outdoor cameras are constantly exposed to motion (cars passing, trees swaying, animals). Advanced motion detection with human/vehicle detection or activity zones helps reduce false alerts, notifying you only when genuinely significant events occur.
- Robust Connectivity: Outdoor cameras are often further from your Wi-Fi router. Strong Wi-Fi antennas or the option for wired Ethernet connections are important for stable data transmission.
- Two-Way Audio (with a good speaker): While not always a primary feature for outdoor cameras, it can be useful for deterring intruders or communicating with delivery drivers. The speaker needs to be powerful enough to be heard clearly outside.
- Cloud and Local Storage Options: Given the volume of outdoor motion events, flexible storage is key. Cloud storage offers remote access and redundancy, while local storage (SD card or NVR/DVR) provides a backup and can be more cost-effective for continuous recording.
Features Important for Indoor Cameras:
- Discreet Design: Indoor cameras are part of your home’s interior, so a less intrusive, more aesthetically pleasing design is often preferred. Many are small, sleek, and designed to blend in.
- Two-Way Audio: This is a highly valued feature for indoor cameras. It allows you to speak to family members, pets, or even an intruder. The audio quality needs to be clear for effective communication.
- Privacy Features: Since these cameras are inside your home, privacy is paramount. Look for features like privacy modes (which physically or digitally block the lens), geofencing (which turns the camera off when you’re home), or the ability to disable recording when certain conditions are met.
- Pan-and-Tilt Functionality: Many indoor cameras offer the ability to remotely pan (move horizontally) and tilt (move vertically) the lens, allowing you to cover a wider area from a single camera placement. This is less common and often unnecessary for outdoor cameras which are usually fixed on a specific area.
- Pet Monitoring Features: Some indoor cameras come with features tailored for pet owners, such as treat dispensers or specific motion detection for pets.
- Facial Recognition: Advanced indoor cameras might offer facial recognition to identify family members and distinguish them from strangers, reducing unnecessary alerts.
- Integration with Smart Home Ecosystems: Indoor cameras often serve as a hub for smart home devices, integrating with platforms like Google Home, Amazon Alexa, or Apple HomeKit for voice control and automation.
Placement and Strategic Considerations
The placement of your cameras is just as important as their features.
Outdoor Camera Placement:
- Entry Points: Focus on all doors (front, back, side, garage) and accessible windows. These are the most common entry points for intruders.
- Driveways and Yards: Cover your driveway to monitor vehicles and anyone approaching your home. Extend coverage to your yard to deter loiterers.
- High Vantage Points: Mount cameras high enough to prevent easy tampering but low enough to capture clear facial images. Under eaves or on higher walls are common locations.
- Lighting: Be mindful of direct sunlight that can cause glare or strong backlighting. Also, consider existing outdoor lighting to enhance night vision.
- Wi-Fi Signal Strength: Ensure good Wi-Fi coverage or run Ethernet cables for reliable connectivity.
- Power Source: Plan for power outlets. Many outdoor cameras are wired, but battery-powered options offer more flexibility in placement.
Indoor Camera Placement:
- High-Traffic Areas: Place cameras in living rooms, hallways, or kitchens where people frequently move.
- Entryways: Position cameras to capture anyone entering or exiting your home, especially near the main door.
- Valuable Items: Consider placing a camera to monitor areas where valuables are kept, such as a safe or a home office.
- Children’s Rooms/Nurseries: For monitoring children (with appropriate privacy considerations and consent).
- Pet Areas: To keep an eye on your furry friends.
- Avoid Direct Light Sources: Don’t point indoor cameras directly at windows or lamps, as this can cause glare and poor image quality.
- Power and Wi-Fi: Indoor cameras typically need to be near an outlet and within reliable Wi-Fi range.
Powering Your Surveillance System
Powering your cameras is a critical consideration, and options differ between indoor and outdoor models.
Outdoor Camera Power:
- Wired (PoE – Power over Ethernet): This is often the most reliable option for outdoor cameras. A single Ethernet cable provides both power and data, simplifying installation and ensuring a stable connection. It’s ideal for permanent installations.
- Wired (Dedicated Power Adapter): Some outdoor cameras require a separate power cable run from an outlet. This means you’ll need to ensure an outdoor-rated outlet is available or professionally installed.
- Battery-Powered: These offer the most flexibility in placement as they don’t require wiring. However, batteries need regular recharging or replacement, and their performance can be affected by extreme temperatures. Solar panel accessories can extend battery life.
Indoor Camera Power:
- Wired (USB or Power Adapter): The vast majority of indoor cameras are powered via a standard USB cable and wall adapter, making them very easy to set up.
- Battery-Powered: Less common than for outdoor cameras, but some indoor models are battery-powered for truly wire-free placement. These are often used for temporary monitoring or in areas where outlets are scarce.
Storage Solutions: Where Does the Footage Go?
Both indoor and outdoor cameras need a way to store captured footage.
Common Storage Options:
- Cloud Storage: Footage is uploaded to secure remote servers.
- Pros: Accessible from anywhere, data is safe even if the camera is destroyed or stolen, often includes smart features like person detection.
- Cons: Usually requires a monthly subscription fee, can be reliant on internet speed for upload.
- Local Storage (SD Card): Many cameras have a slot for a microSD card.
- Pros: No subscription fee, footage is stored directly on the device, works even if the internet goes down.
- Cons: Limited storage capacity (footage gets overwritten), data is lost if the camera is stolen or damaged, requires physical access to retrieve footage.
- Network Video Recorder (NVR) / Digital Video Recorder (DVR): For more extensive systems, footage is recorded to a dedicated NVR (for IP cameras) or DVR (for analog cameras) on your property.
- Pros: Large storage capacity, continuous recording possible, centralized management of multiple cameras.
- Cons: Higher initial cost, requires a dedicated piece of hardware and space, typically used for larger, more professional setups.
For outdoor cameras, a combination of local and cloud storage is often ideal – local as a backup if the internet fails, and cloud for remote access and security. For indoor cameras, cloud storage or local SD card storage are typically sufficient, depending on your needs for remote access and historical footage.
Connectivity: Staying Connected to Your Cameras
How your cameras connect to your network and the outside world is crucial for remote monitoring and alerts.
Connectivity Options:
- Wi-Fi: The most common connectivity method for both indoor and many outdoor cameras.
- Pros: Wireless, easy setup.
- Cons: Range limitations, susceptible to interference, can be less stable than wired connections, security concerns if not properly secured.
- Ethernet (Wired): Primarily used for outdoor cameras, especially those with PoE.
- Pros: Most stable and reliable connection, no Wi-Fi interference, can provide power (PoE).
- Cons: Requires running cables, less flexible in placement.
- Cellular (LTE/4G/5G): A niche but growing option, particularly for remote outdoor locations without Wi-Fi.
- Pros: Truly wireless, independent of home internet.
- Cons: Requires a data plan (and SIM card), higher operating cost, can have slower speeds than Wi-Fi/Ethernet.
For outdoor cameras, a strong Wi-Fi signal or wired Ethernet is paramount for consistent performance. Indoor cameras generally have an easier time with Wi-Fi due to closer proximity to the router.
Cost Considerations: Balancing Budget and Security
The cost of surveillance cameras varies widely based on brand, features, and type.
-
Entry-Level Indoor Cameras: You can find basic indoor cameras for as little as $20-$50. These typically offer 1080p resolution, basic motion detection, and two-way audio.
-
Mid-Range Indoor Cameras: In the $50-$150 range, you’ll find cameras with better resolution, pan-and-tilt, advanced motion detection, and tighter smart home integration.
-
High-End Indoor Cameras: Above $150, you’ll get features like facial recognition, enhanced privacy options, and superior build quality.
-
Entry-Level Outdoor Cameras: Start around $50-$100 for basic weatherproof models with 1080p.
-
Mid-Range Outdoor Cameras: $100-$250 will get you better resolution (2K/4K), more robust weatherproofing, superior night vision, and more advanced motion analytics.
-
High-End Outdoor Cameras: Above $250, you’re looking at professional-grade cameras with advanced optical zoom, extremely wide dynamic range, AI-powered analytics, and robust anti-tamper features.
Don’t forget to factor in ongoing costs like cloud storage subscriptions, which can add $5-$20 per month per camera or for a whole system, depending on the provider and storage duration. While cheaper cameras might seem appealing, investing in slightly more expensive models often pays off in terms of reliability, image quality, and advanced features that genuinely enhance your security.
Installation: DIY vs. Professional
The ease of installation also differs between indoor and outdoor cameras.
DIY Installation:
- Indoor Cameras: Generally very easy to install. Most are plug-and-play, requiring only a power outlet and connection to your Wi-Fi via an app. Placement on shelves or simple wall mounts is common.
- Battery-Powered Outdoor Cameras: Also relatively easy as they don’t require wiring. Just mount them and connect to Wi-Fi.
- Wired Outdoor Cameras: Can be more challenging for DIYers, especially if you need to drill through walls for cabling (Ethernet or power) or need to install new outdoor outlets.
Professional Installation:
- Recommended for Wired Outdoor Systems: If you’re planning a comprehensive wired outdoor system, especially one with PoE or NVRs, professional installation ensures proper wiring, optimal camera placement for coverage, and secure mounting.
- For Complex Setups: If you have a large property, specific blind spots, or want a highly integrated system, professionals can design and implement a solution tailored to your needs.
- Benefits: Ensures proper functionality, aesthetically pleasing cable management, and peace of mind that the system is correctly secured and configured.
The Verdict: A Blended Approach is Best
Ultimately, for comprehensive home security, you’ll likely need a combination of both indoor and outdoor surveillance cameras.
- Outdoor cameras act as your first line of defense, deterring potential intruders and providing crucial evidence of activities outside your home. Their rugged design and advanced outdoor-specific features are indispensable for this role.
- Indoor cameras offer peace of mind by allowing you to monitor your home’s interior, check on children or pets, and provide additional layers of security in case an intruder gains entry. Their discreet design and communication features make them ideal for internal monitoring.
When choosing, prioritize features based on the camera’s intended location. For outdoor cameras, focus on weatherproofing, high resolution, powerful night vision, and smart motion detection. For indoor cameras, consider discreet design, two-way audio, privacy features, and pan-and-tilt if you need wider coverage.
By carefully considering the unique demands and features of both indoor and outdoor surveillance cameras, you can create a robust and effective security system that provides comprehensive coverage and peace of mind for your home and family.
Discover more from ChenAnIoT
Subscribe to get the latest posts sent to your email.


