Security Camera IP Configuration:
How to configure the camera IP address?
For anyone setting up a modern security system, the question of how to assign an IP address to a camera is fundamental. Should you let your router automatically handle it, or should you manually assign a fixed IP? This seemingly technical decision is one of the most critical you’ll make, impacting everything from the reliability of your remote viewing to the simplicity of system maintenance. Making the wrong choice can lead to frustrating black screens, lost footage, and endless troubleshooting headaches.
This comprehensive guide will demystify the core concepts of IP configuration and provide a clear, actionable framework to help you choose the best option for your security system, whether it’s a simple home setup or a complex commercial installation.
Understanding the Fundamentals: What’s an IP Address?
Before we dive into the pros and cons, let’s quickly define what an IP address is. Think of an IP (Internet Protocol) address as a unique street address for every device on your network. Just as a package needs a specific address to reach your home, data packets need an IP address to find their way to your security camera.
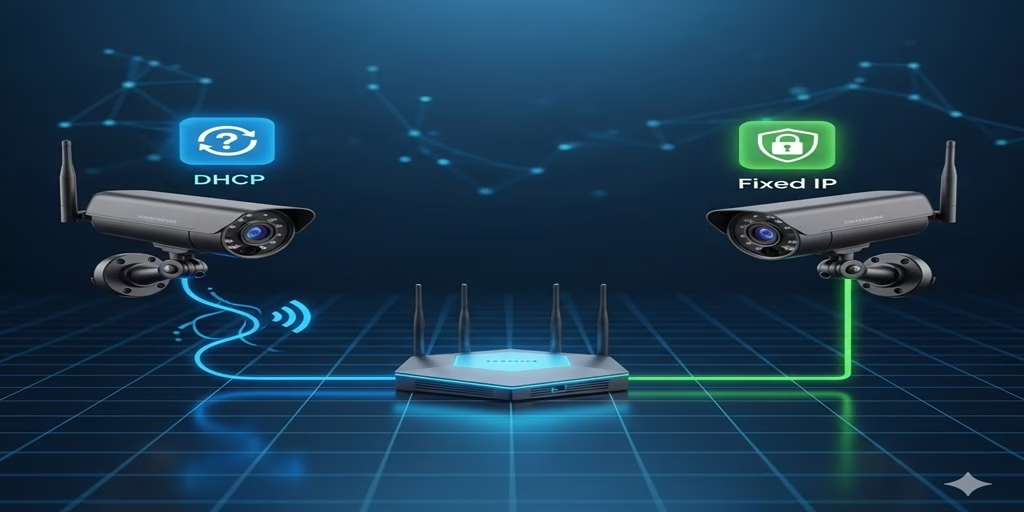
There are two primary ways a device can be assigned an IP address on a network: automatically via DHCP or manually with a static IP.
DHCP (Dynamic Host Configuration Protocol): The Automatic Approach
DHCP is a network protocol that automatically assigns a temporary IP address to any device that connects to the network. Your router acts as the DHCP server, essentially a receptionist that hands out room keys to new guests. When your security camera powers on and connects, it asks the router for an IP address, and the router provides one from a pre-defined pool. This process is seamless and requires no manual input from you.
Static (Fixed) IP: The Manual Approach
A static IP is a permanent, manually assigned address that never changes. It’s like having a dedicated street address for your security camera. Instead of asking the router for an address, you log into the camera’s configuration and hard-code a specific, permanent IP address. This address remains the same even if the camera or router reboots.
Automatic IP (DHCP): The Plug-and-Play Simplicity
For many home users, DHCP is the go-to choice due to its sheer convenience. It simplifies the setup process, getting your cameras up and running in minutes.
Advantages of DHCP
- Ease of Use: This is DHCP’s biggest selling point. You simply plug in the camera, connect it to your network, and it works. There’s no need to access a browser, find the network settings, or type in a series of numbers. It’s a true “plug-and-play” experience that’s perfect for beginners or those adding a single camera.
- Reduced Manual Effort: You don’t have to keep a log of which IPs are assigned to which devices. The router manages the entire process, preventing you from accidentally assigning the same IP to two different devices.
- Scalability for Small Networks: If you’re just adding a few cameras, DHCP makes the process frictionless. The router has plenty of addresses to hand out, and you won’t have to worry about the numbers.
Disadvantages of DHCP
- IP Address Instability: The core problem with DHCP is that the assigned IP is not guaranteed to be permanent. The router only “leases” the address for a certain period. When the lease expires, the router can give the camera a completely new IP address. This often happens after a power outage, a router reboot, or an extended period of being disconnected.
- Unreliable Remote Access: This is the most significant drawback for security systems. If your camera’s IP address changes, your NVR (Network Video Recorder), DVR (Digital Video Recorder), or mobile app will lose its connection. You will need to find the new IP and reconfigure your settings, which defeats the purpose of a 24/7 security system.
- Troubleshooting Challenges: When a camera goes offline, the first step is to find its IP address. With a DHCP-assigned IP, this can be difficult. You might have to use network scanning tools or log into your router to hunt down the new address, adding extra steps to the troubleshooting process.
- Dependency on the DHCP Server: The entire system relies on your router’s DHCP service working correctly. If the service fails, any new cameras you try to connect won’t be able to get an IP address.
Fixed IP (Static IP): The Foundation of Reliability
For professional security installations, a fixed IP address is the gold standard. It provides the stability and control necessary for reliable, long-term operation.
Advantages of Fixed IP
- Absolute Stability: With a static IP, a camera’s address never changes. It is permanently fixed, regardless of power outages or router reboots. This is crucial for maintaining a constant connection.
- Reliable Remote Access and Integration: This stability is vital for systems that rely on constant communication. Your NVR or DVR will always know exactly where to find the camera. Similarly, remote viewing apps and cloud services will maintain a consistent connection without interruption.
- Simplified Management and Troubleshooting: You can easily create a simple spreadsheet to track the IP address of every camera in your system. When a camera goes offline, you already know its address, simplifying the troubleshooting process. Just ping the IP to see if the camera is online, or log in directly to its web interface.
- Enhanced Security: In professional environments, static IPs are easier to manage with network firewalls. You can create specific rules to allow traffic only from a list of known, static IP addresses, reducing the risk of unauthorized access.
Disadvantages of Fixed IP
- Manual Configuration Required: The setup process is more involved. You must log into each camera’s settings and manually enter the IP address, subnet mask, gateway, and DNS servers. This requires a basic understanding of network fundamentals.
- Potential for IP Address Conflicts: If you’re not careful, you could manually assign the same static IP address to two different devices. This will cause both devices to lose their network connection and create significant troubleshooting challenges. Proper planning is essential.
- Administrative Overhead: You need to maintain a log of all assigned static IPs to prevent conflicts. This can be time-consuming for large installations.
- Lack of Portability: If you move the camera to a different network, you will have to manually reconfigure its IP address to match the new network’s settings.
The Critical Choice: A Practical Guide
Now that you understand the pros and cons, here’s a practical guide to help you decide which option is right for your situation.
Scenario 1: Small Home System (1-3 cameras)
- Initial Setup: You can start with DHCP for a quick and easy setup.
- Recommendation: For long-term reliability, consider a hybrid approach: DHCP Reservation.
Scenario 2: Professional or Commercial System (5+ cameras)
- Recommendation: Always use a Fixed IP. For any business or serious security setup, stability is non-negotiable. The extra effort of manual configuration upfront is a small price to pay for a system that won’t randomly go offline.
Scenario 3: The Hybrid Approach – The Best of Both Worlds
For the majority of users, the ideal solution isn’t a pure static IP or DHCP—it’s DHCP Reservation, also known as DHCP Binding or Static DHCP.
How it Works:
- Find the Camera’s MAC Address: Every network device has a unique, permanent hardware address called a MAC (Media Access Control) address. You can usually find it on a sticker on the camera or in your router’s list of connected devices.
- Log Into Your Router: Access your router’s administration page.
- Find DHCP Reservation Settings: Look for sections like “Static IP Allocation,” “DHCP Binding,” or “Address Reservation.”
- Bind the IP Address: You will tell your router to “reserve” a specific IP address for the camera’s unique MAC address.
- Reboot: After saving the settings, reboot both the router and the camera.
The Result: The camera is configured for DHCP, so it will request an IP address automatically. However, your router will always give it the same, permanent IP address you reserved. This combines the stability of a static IP with the ease of a DHCP setup, making it the best practice for most home and small business users.
Step-by-Step Configuration Guides
How to Set Up a Static IP on a Security Camera
- Find an Available IP: Check your router’s DHCP pool (e.g.,
192.168.1.100to192.168.1.199). Choose an address outside this range (e.g.,192.168.1.50). - Access Camera’s Web Interface: Connect your computer to the same network and use a network scanning tool (like Advanced IP Scanner) to find the camera’s current IP.
- Log In: Enter the camera’s IP address into a web browser and log in with the administrator credentials.
- Navigate to Network Settings: Find the “Network,” “TCP/IP,” or “LAN Settings” menu.
- Disable DHCP: Change the IP acquisition mode from “DHCP” or “Dynamic” to “Static.”
- Enter Details: Manually type in your chosen IP address, the subnet mask (usually
255.255.255.0), the gateway (your router’s IP), and the DNS server (you can use your router’s IP or public DNS like8.8.8.8). - Save and Reboot: Save the settings and reboot the camera.
How to Set Up DHCP Reservation on a Router
- Find Camera’s MAC Address: Check the camera’s label or find it in your router’s “connected devices” list.
- Log In to Router: Enter your router’s IP address into a browser and log in.
- Find DHCP Settings: Navigate to the “LAN,” “DHCP Server,” or “Network Settings” section.
- Locate Reservation List: Find the option for “DHCP Reservation,” “Address Reservation,” or “Static IP Allocation.”
- Add a New Rule: Enter the camera’s MAC address and your desired permanent IP address.
- Save and Reboot: Save the changes and reboot the router. The camera will automatically receive the same IP address every time.
Best Practices and Final Thoughts
- Document Everything: No matter which method you choose, it is good practice to create a simple spreadsheet or document to record each camera’s IP address, location, and purpose. This is a game-changer for long-term maintenance.
- Secure Your Network: Always change your camera’s default password to a strong, unique one. IP configuration is just one part of network security.
- Choose the Right Tool for the Job: For a single camera, DHCP is fine. For a professional system, a static IP is necessary. For the vast majority of home and small business users, DHCP Reservation offers the perfect blend of simplicity and stability.
In summary
Ultimately, the choice comes down to a trade-off between convenience and control. For a mission-critical device like a security camera, a stable, fixed IP is a worthy investment. By understanding the options and implementing the right solution for your environment, you can build a reliable surveillance system that works when you need it most.
Discover more from ChenAnIoT
Subscribe to get the latest posts sent to your email.


13 Responses
What’s up, constantly i used to check webpage posts here early in the morning,
because i like to learn more and more.
Way cool! Some extremely valid points! I appreciate you penning
this article plus the rest of the website is really good.
Today, I went to the beach front with my kids. I found a sea shell and gave
it to my 4 year old daughter and said “You can hear the ocean if you put this to your ear.” She put the
shell to her ear and screamed. There was a hermit crab inside and it pinched her ear.
She never wants to go back! LoL I know this is entirely
off topic but I had to tell someone!
I have been exploring for a little bit for any high quality articles or weblog
posts on this kind of area . Exploring in Yahoo I at last stumbled upon this web site.
Studying this information So i’m satisfied to exhibit
that I have a very just right uncanny feeling I found out exactly
what I needed. I such a lot indubitably will make certain to
don?t overlook this website and provides it a glance on a
relentless basis.
Wonderful site. Plenty of useful information here.
I am sending it to a few buddies ans additionally
sharing in delicious. And obviously, thank you in your sweat!
Inspiring story there. What occurred after? Good luck!
I am really enjoying the theme/design of your blog. Do you ever run into any web browser compatibility problems?
A small number of my blog visitors have complained about my site not working correctly
in Explorer but looks great in Chrome. Do you have any
solutions to help fix this issue?
all the time i used to read smaller content that as
well clear their motive, and that is also happening with this post which I am reading now.
Pretty part of content. I simply stumbled upon your web site and
in accession capital to assert that I acquire in fact enjoyed account your weblog
posts. Any way I will be subscribing for your feeds or even I achievement you get right of entry to constantly quickly.
Hi, I want to subscribe for this web site to obtain hottest updates, therefore
where can i do it please assist.
Generally I don’t read article on blogs, but I wish to say
that this write-up very compelled me to try and do so!
Your writing taste has been amazed me. Thank you, very nice post.
I am in fact grateful to the owner of this web page who has shared this impressive paragraph at at this place.
Thank you for your feedback. We will share more related content in the future.